
Looking to create looping animations in Cinema 4D, and end up just copying the keyframes over and over? Well no more! If you're familiar with After Effects Expressions, you can loop animations using the loopOut expression. If you're looking to do something similar in Cinema 4D, you might want to just create a bunch of copied keyframes, or look to writing some crazy Xpresso scripts to handle the looping. But by using the animation track properties in the attributes window, you can loop animations a set number of times using the Oscillate setting in the Track Properties, under attributes.
This technique can be utilized in both the full Studio version of Cinema 4D, as well as the After Effects version, Cinema 4D Lite.
Want to learn more about Cinema 4D Lite to get off the ground in 3D?
Learn how to Create a 3D extruded logo in Cinema 4D or Cinema 4D Lite.
Then learn how to Work with Materials and Reflectance textures in Cinema 4D.
Next learn about 3D Lighting and HDRI Sky images in Cinema 4D.
And then learn about Creating Animation, working with Keyframes, and the Cinema 4D Timeline.
To get started with this technique of creating looping animations in Cinema 4D, all you need to do is create 2 keyframes. Here we have the top and bottom points of a sphere animating vertically, in order to create the bouncing look.
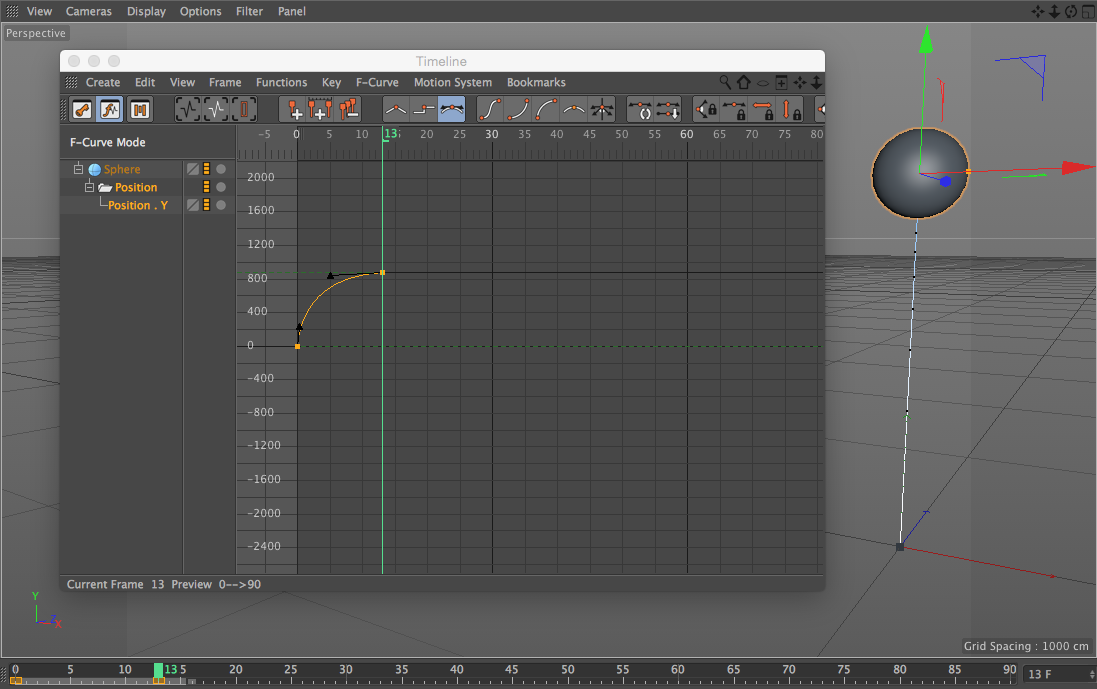
Look at that smooooth curve.
With the full Cinema 4D timeline open (accessible via Window > Timeline), when you click on the track, it'll open up the Track Properties under attributes. This is where you can adjust what happens before and after the two keyframes.

Houston, we have looping!
By changing the "After" dropdown to "Oscillate," the animation will repeat. This way all you have to adjust is that one animation curve, and it will change the entire animation. If you want it to loop infinitely, you can change the number of repetitions. Now that's a nice loop!
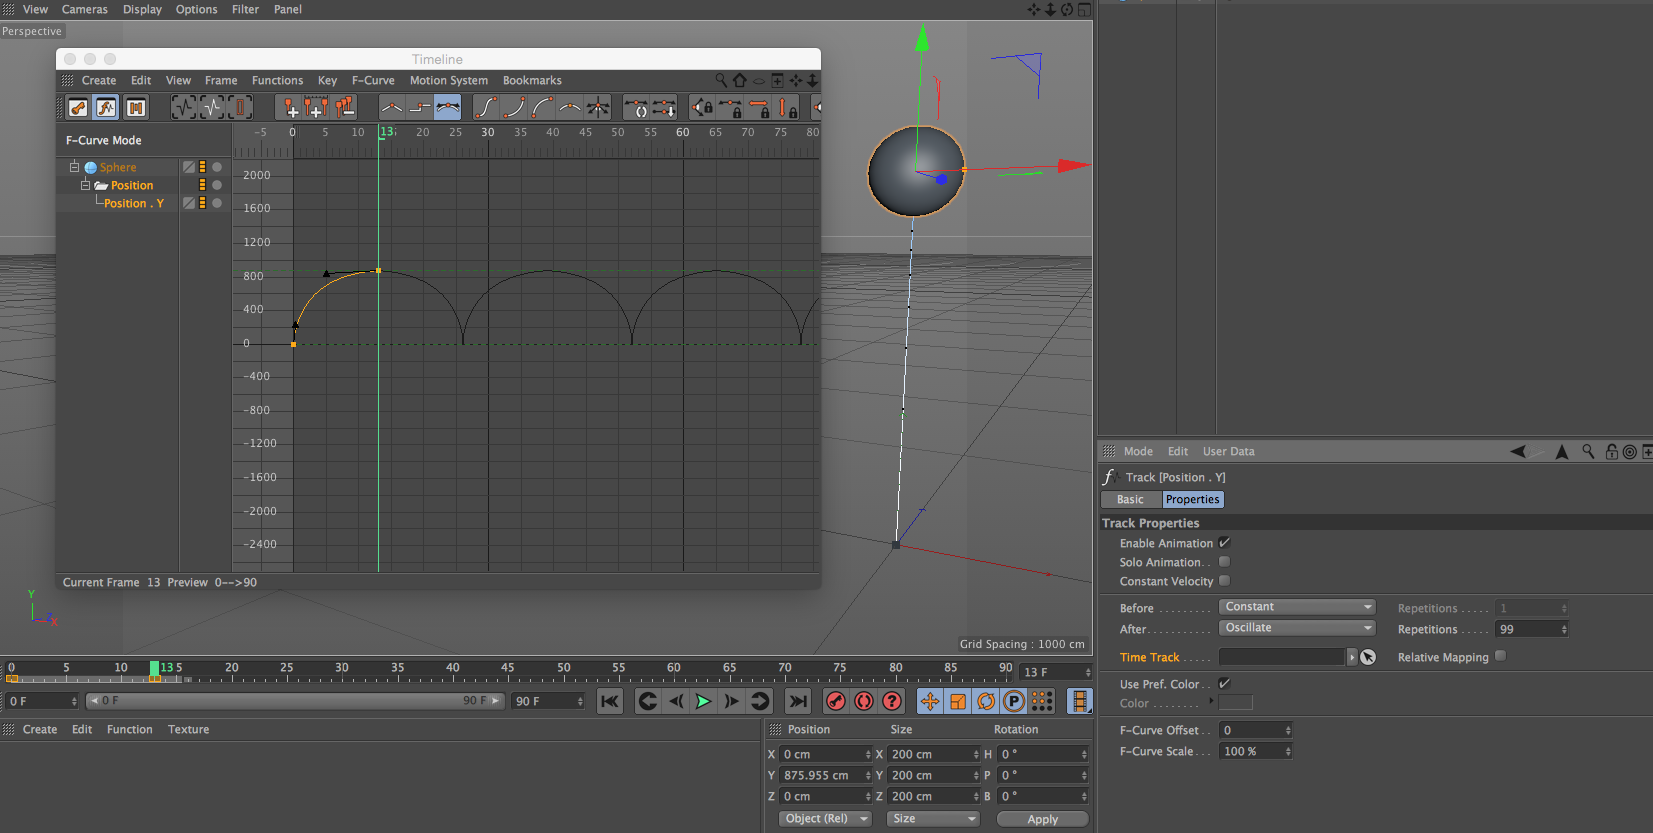
When will it end?!?!?! Oh, after 99 times.
If you want to go further with this technique, you can add additional keyframes and loop keyframe animations beyond two. After adding in an additional keyframe in the center, as an example, it will loop the full set. Getting a bit deeper into f-Curve animations in the Cinema 4D timeline, you can hold SHIFT to adjust online one side of the tangent, ALT/OPTION to adjust only the VALUE, and COMMAND to adjust only what is happening over TIME.
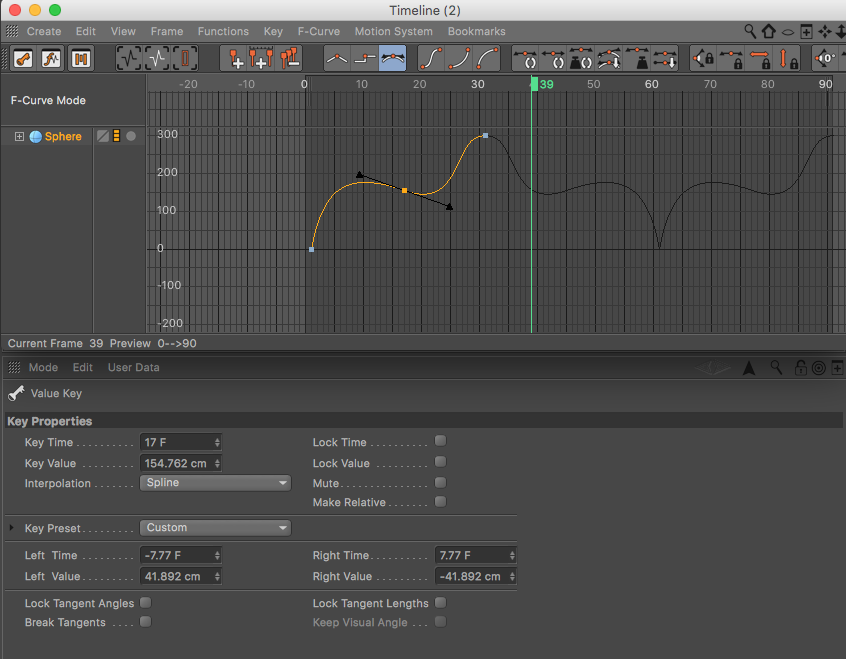
BoooooOOOOooo. Urns.
Like this tutorial? Consider becoming a Patron at Patreon.com/SeanFrangella to get additional benefits such as project files and more!
To get weekly Motion Graphics, VFX, and 3D animation tutorials be sure to subscribe to the show on YouTube!
Looking for the next Tutorial to watch?
Check out the Top 5 Features of Element 3D V2 for After Effects!
Learn about the new 3D Character Creator app, Adobe Fuse!
Learn about the Top 5 new features of Cinema 4D R17!
Learn the Top 5 After Effects Expressions!
Learn how to Recreate the Agengers: Age of Ultron 3D Title Animation!
See how to Combine Element 3D with the new Saber Plug-in!
Learn about the Top 5 Hidden Features of Illustrator CC!
See how to bring Animated 3D Characters into Element 3D!
To check out new features added to Cinema 4D R16!
Check out the Top 5 Tips for Better Camera Animation in After Effects!